上一节主要讲解了springboot怎么用数据库连接池连接数据库,这一节主要讲解如何利用jpa操作mysql数据库。
jpa是spring出的一个很方便的持久化ORM框架,可以在不用写太多的代码的情况下就可以完成数据库的增删改查操作
目录
1、在mysql数据库中建立需要的库和表
-- 创建数据库test
create schema if not exists test collate utf8mb4_0900_ai_ci;

-- 创建用户表
create table if not exists t_user
(
	id char(32) not null,
	user_name varchar(50) not null,
	user_pswd varchar(40) not null,
	create_date datetime not null,
	create_by char(32) not null,
	update_date datetime not null,
	update_by char(32) not null,
	constraint t_user_id_uindex
		unique (id)
);
-- 修改主键为id
alter table t_user
	add primary key (id);
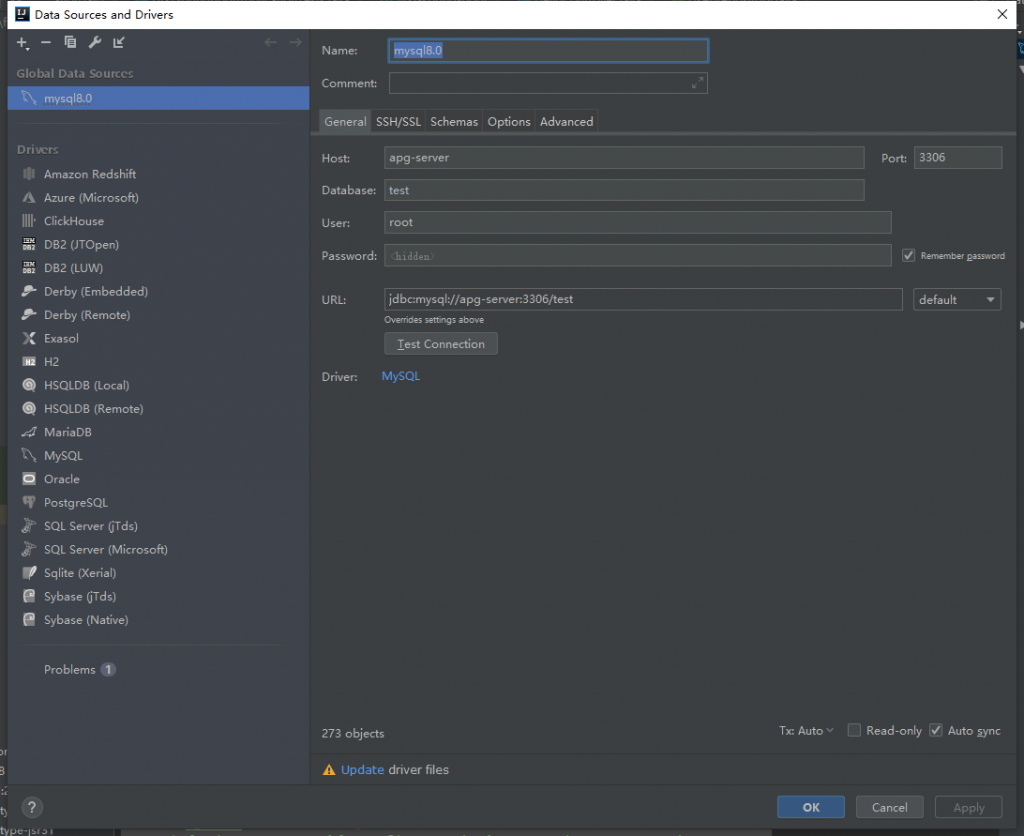
2、使用idea的datasource连接到mysql数据库
idea自带datasource工具,可以使用它连接到mysql的test数据库,jpa就可以利用这个数据源完成实体类的映射
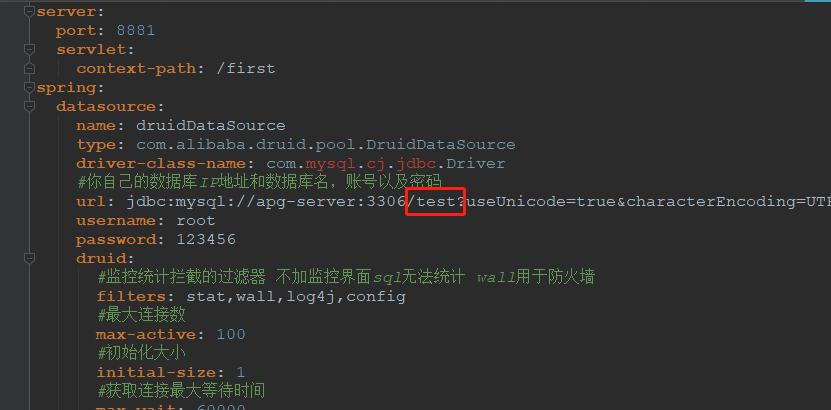
3、更改springBoot配置文件连接到的数据库名
之前配置文件中的数据库名如果不是test需要修改一下
4、给当前项目添加jpa模块依赖,用来自动映射表到实体类
追加jpa模块支持,就可以实现表结构的自动映射
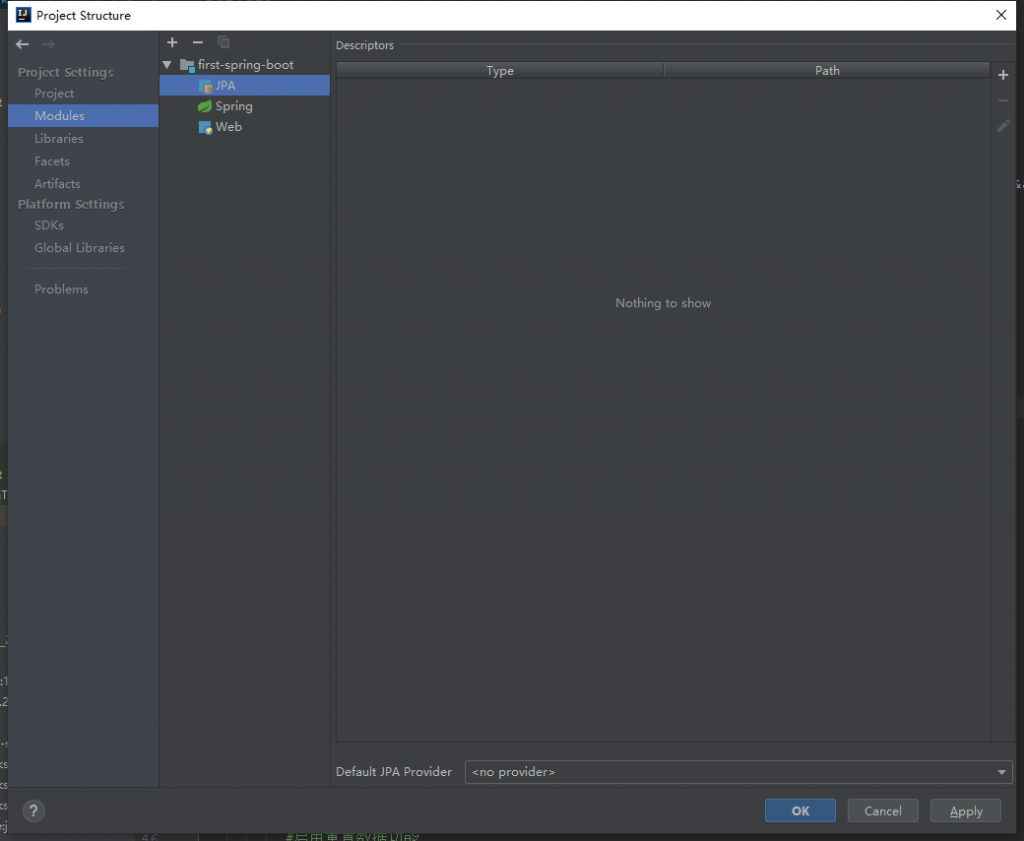
选中first-spring-boot项目名,按下F4快捷键,或者在File-Project Structure也可以打开

点击加号,添加jpa框架支持,我这里之前已经添加过了,所有点加号出来是没有的,如果没有添加过jpa框架,点加号里面就可以找到jpa

添加完成后,如下图所示
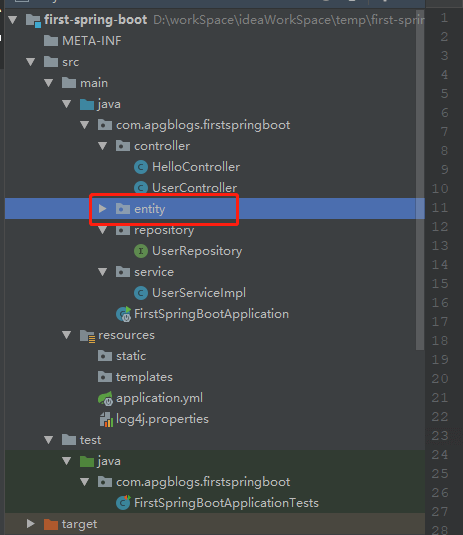
新建实体类包,起名为Entity,不用添加类,jpa会自动生成实体类
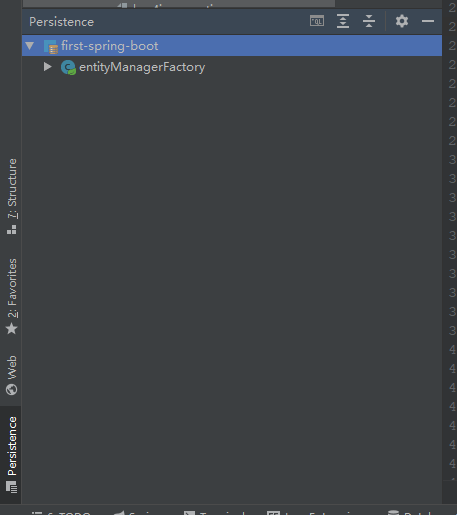
在idea窗口中找到Persistence窗口,如果界面上没有,可以连续按下两次shift,输入Persistence就可以打开这个窗口了
开始映射表结构,在Persistence窗口中,右击first-spring-boot,选择如下图所示功能
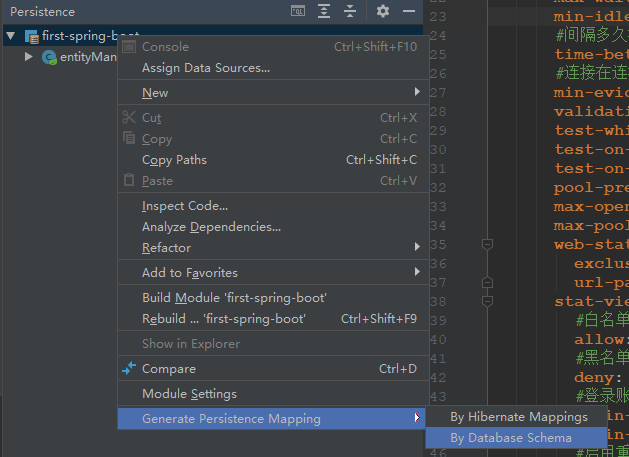
选择红色框中的内容,点击ok就可以生成实体类了
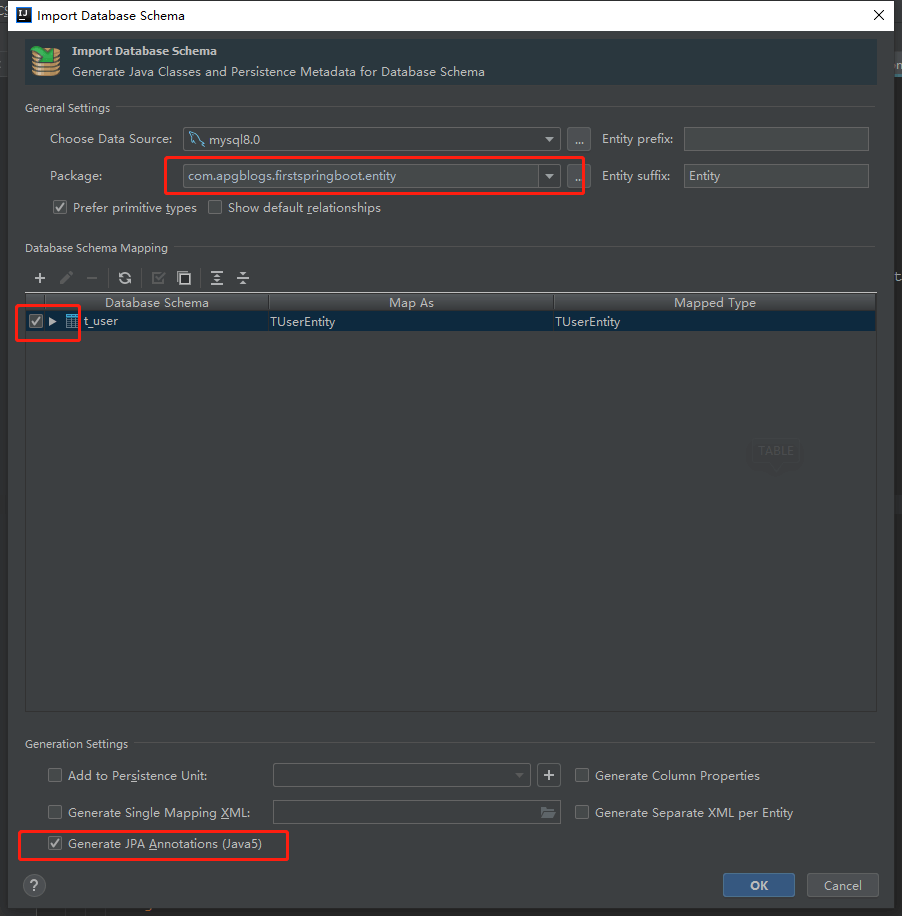
生成后的实体类,也是可以直接使用的,但是为了更方便操作数据库,我们追加jpa的注解类,这样可以实现创建日期和修改日期的自动生成,无需再代码中set当前系统时间,也可以实现主键ID的自动生成,使用uuid作为主键生成策略,改造后的实体类代码如下
package com.apgblogs.firstspringboot.entity;

import org.hibernate.annotations.GenericGenerator;
import org.springframework.data.annotation.CreatedDate;
import org.springframework.data.annotation.LastModifiedDate;
import org.springframework.data.jpa.domain.support.AuditingEntityListener;

import javax.persistence.*;
import java.sql.Timestamp;
import java.util.Objects;

/**
 * @author xiaomianyang
 * @description
 * @date 2019-06-13 12:02
 */
@Entity
@EntityListeners(AuditingEntityListener.class)
@Table(name = "t_user", schema = "test", catalog = "")
public class TUserEntity {
    private String id;
    private String userName;
    private String userPswd;
    private Timestamp createDate;
    private String createBy;
    private Timestamp updateDate;
    private String updateBy;

    @Id
    @Column(name = "id")
    @GenericGenerator(name = "jpa-uuid", strategy = "uuid")
    @GeneratedValue(generator = "jpa-uuid")
    public String getId() {
        return id;
    }

    public void setId(String id) {
        this.id = id;
    }

    @Basic
    @Column(name = "user_name")
    public String getUserName() {
        return userName;
    }

    public void setUserName(String userName) {
        this.userName = userName;
    }

    @Basic
    @Column(name = "user_pswd")
    public String getUserPswd() {
        return userPswd;
    }

    public void setUserPswd(String userPswd) {
        this.userPswd = userPswd;
    }

    @Basic
    @Column(name = "create_date")
    @CreatedDate
    public Timestamp getCreateDate() {
        return createDate;
    }

    public void setCreateDate(Timestamp createDate) {
        this.createDate = createDate;
    }

    @Basic
    @Column(name = "create_by")
    public String getCreateBy() {
        return createBy;
    }

    public void setCreateBy(String createBy) {
        this.createBy = createBy;
    }

    @Basic
    @Column(name = "update_date")
    @LastModifiedDate
    public Timestamp getUpdateDate() {
        return updateDate;
    }

    public void setUpdateDate(Timestamp updateDate) {
        this.updateDate = updateDate;
    }

    @Basic
    @Column(name = "update_by")
    public String getUpdateBy() {
        return updateBy;
    }

    public void setUpdateBy(String updateBy) {
        this.updateBy = updateBy;
    }

    @Override
    public boolean equals(Object o) {
        if (this == o) return true;
        if (o == null || getClass() != o.getClass()) return false;
        TUserEntity that = (TUserEntity) o;
        return Objects.equals(id, that.id) &&
                Objects.equals(userName, that.userName) &&
                Objects.equals(userPswd, that.userPswd) &&
                Objects.equals(createDate, that.createDate) &&
                Objects.equals(createBy, that.createBy) &&
                Objects.equals(updateDate, that.updateDate) &&
                Objects.equals(updateBy, that.updateBy);
    }

    @Override
    public int hashCode() {
        return Objects.hash(id, userName, userPswd, createDate, createBy, updateDate, updateBy);
    }
}
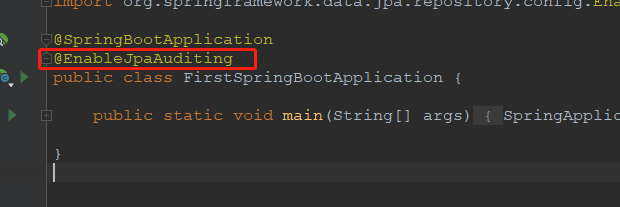
追加了jpa注解后,还要在启动类上面添加启动jpa注解
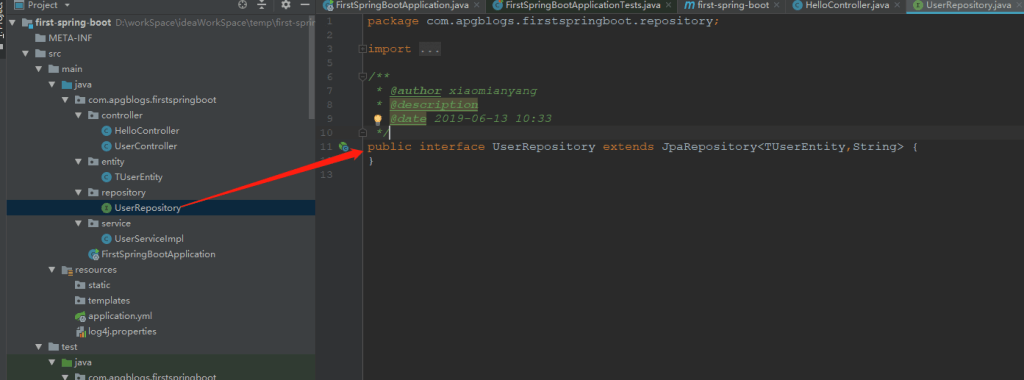
5、新建Repository包,创建UserRepository接口
新建UserRepository接口类如下图
6、编写UserService层方法,实现增删改查的业务逻辑实现
UserServiceImpl类代码如下
package com.apgblogs.firstspringboot.service;

import com.apgblogs.firstspringboot.entity.TUserEntity;
import com.apgblogs.firstspringboot.repository.UserRepository;
import org.springframework.beans.factory.annotation.Autowired;
import org.springframework.stereotype.Service;

import java.util.List;

/**
 * @author xiaomianyang
 * @description
 * @date 2019-06-13 10:35
 */
@Service
public class UserServiceImpl {

    @Autowired
    private UserRepository userRepository;

    /**
     * @description 查询所有用户
     * @author xiaomianyang
     * @date 2019-06-13 10:37
     * @param []
     * @return java.util.List<com.apgblogs.firstspringboot.entity.TUserEntity>
     */
    public List<TUserEntity> getUserList(){
        return userRepository.findAll();
    }

    /**
     * @description 查询单个用户
     * @author xiaomianyang
     * @date 2019-06-13 10:39
     * @param [id]
     * @return com.apgblogs.firstspringboot.entity.TUserEntity
     */
    public TUserEntity getUser(String id){
        return userRepository.findById(id).get();
    }

    /**
     * @description 创建用户
     * @author xiaomianyang
     * @date 2019-06-13 10:45
     * @param [tUserEntity]
     * @return com.apgblogs.firstspringboot.entity.TUserEntity
     */
    public TUserEntity insertUser(TUserEntity tUserEntity){
        tUserEntity.setCreateBy("sys");
        tUserEntity.setUpdateBy("sys");
        return userRepository.save(tUserEntity);
    }

    /**
     * @description 修改用户
     * @author xiaomianyang
     * @date 2019-06-13 10:40
     * @param [tUserEntity]
     * @return com.apgblogs.firstspringboot.entity.TUserEntity
     */
    public TUserEntity updateUser(TUserEntity tUserEntity){
        TUserEntity tUserEntity1=userRepository.findById(tUserEntity.getId()).get();
        if(tUserEntity1==null){
            return null;
        }
        tUserEntity1.setUserName(tUserEntity.getUserName());
        tUserEntity1.setUserPswd(tUserEntity.getUserPswd());
        return userRepository.save(tUserEntity1);
    }

    /**
     * @description 删除用户
     * @author xiaomianyang
     * @date 2019-06-13 10:44
     * @param [id]
     * @return void
     */
    public boolean deleteUser(String id){
        try{
            userRepository.deleteById(id);
        }catch(Exception e){
            e.printStackTrace();
            return false;
        }
        return true;
    }
}
7、编写Controller,采用RestFul风格编写api接口
UserController代码如下
package com.apgblogs.firstspringboot.controller;

import com.apgblogs.firstspringboot.entity.TUserEntity;
import com.apgblogs.firstspringboot.service.UserServiceImpl;
import org.springframework.beans.factory.annotation.Autowired;
import org.springframework.web.bind.annotation.*;

import java.util.List;

/**
 * @author xiaomianyang
 * @description
 * @date 2019-06-13 15:54
 */
@RestController
@RequestMapping("user")
public class UserController {

    @Autowired
    private UserServiceImpl userService;

    /**
     * @description 查询所有用户
     * @author xiaomianyang
     * @date 2019-06-13 16:05
     * @param []
     * @return java.util.List<com.apgblogs.firstspringboot.entity.TUserEntity>
     */
    @GetMapping
    public List<TUserEntity> getAllUser(){
        return userService.getUserList();
    }

    /**
     * @description 获取单个用户
     * @author xiaomianyang
     * @date 2019-06-13 16:05
     * @param [id]
     * @return com.apgblogs.firstspringboot.entity.TUserEntity
     */
    @GetMapping("{id}")
    public TUserEntity getUser(@PathVariable("id")String id){
        return userService.getUser(id);
    }

    /**
     * @description 创建用户
     * @author xiaomianyang
     * @date 2019-06-13 16:05
     * @param [tUserEntity]
     * @return com.apgblogs.firstspringboot.entity.TUserEntity
     */
    @PostMapping
    public TUserEntity insertUser(@RequestBody TUserEntity tUserEntity){
        return userService.insertUser(tUserEntity);
    }

    /**
     * @description 更新用户
     * @author xiaomianyang
     * @date 2019-06-13 16:05
     * @param [tUserEntity]
     * @return com.apgblogs.firstspringboot.entity.TUserEntity
     */
    @PatchMapping
    public TUserEntity updateUser(@RequestBody TUserEntity tUserEntity){
        return userService.updateUser(tUserEntity);
    }

    /**
     * @description 删除用户
     * @author xiaomianyang
     * @date 2019-06-13 16:13
     * @param [id]
     * @return boolean
     */
    @DeleteMapping("{id}")
    public boolean deleteUser(@PathVariable("id")String id){
        userService.deleteUser(id);
        return true;
    }
}
对于代码部分不能理解的,在视频教程中会有详细说明
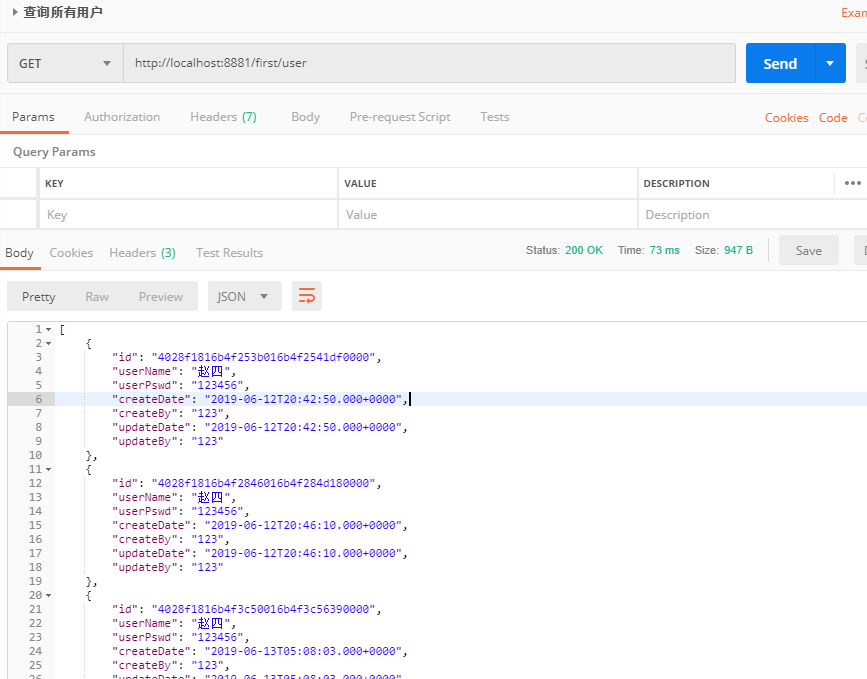
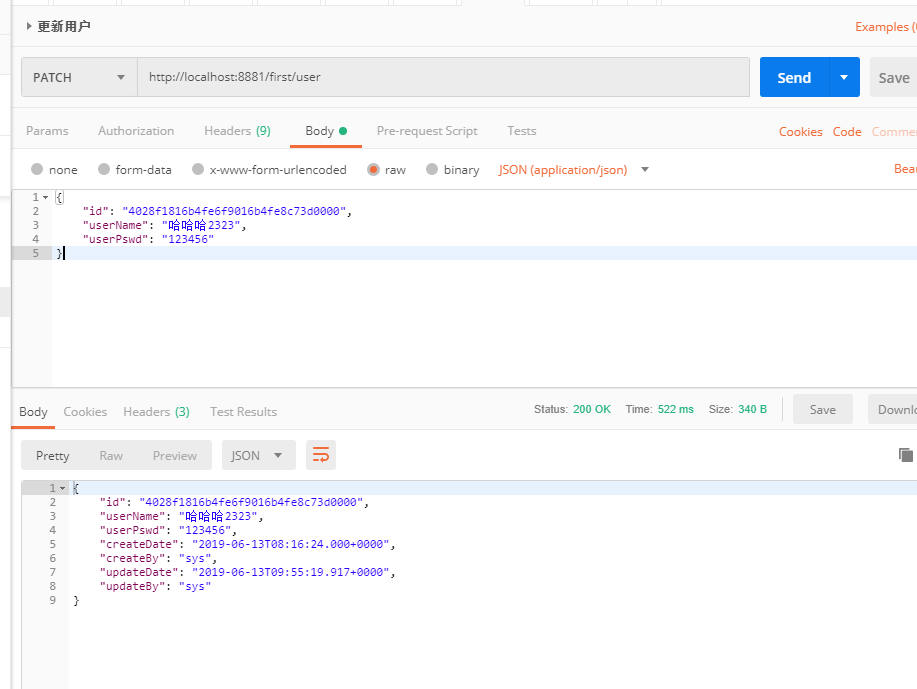
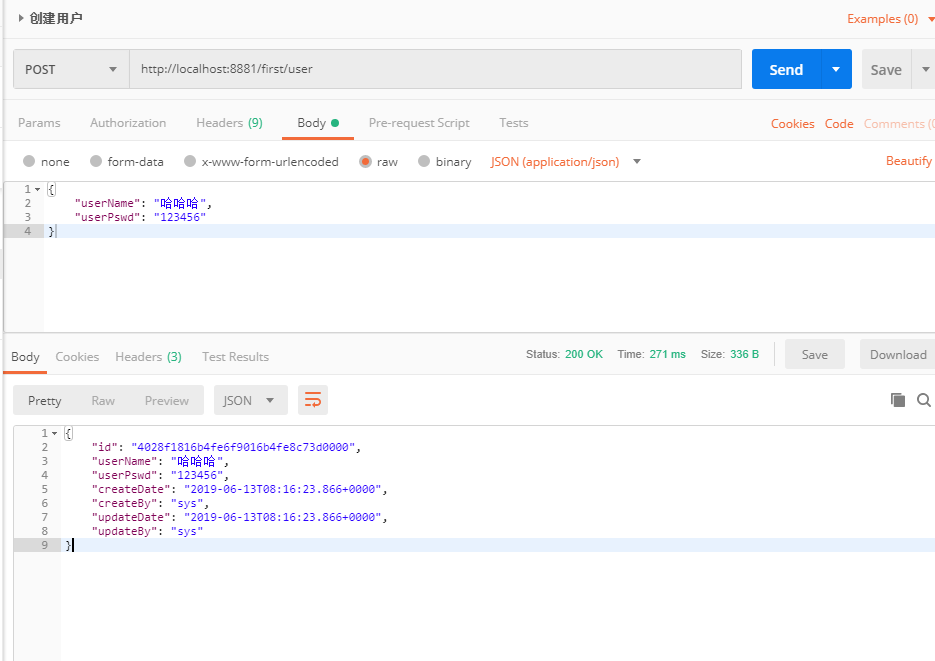
8、启动项目,使用postman测试工具调用api接口

9、文章源码地址
码云: https://gitee.com/apgblogs/springBootStudy
至此就完成了springboot用jpa操作数据库的代码,jpa还支持更多复杂的操作,jpa相比较于mybatis是一个全自动的ORM框架,mybatis是一个半自动化的,以前我也是用mybatis,现在改用jpa了,实际上两个可以结合使用,jpa可以嵌入mybatis,对于ORM框架的选择就看大家的喜好了。
1 条评论