redis的缓存性能是非常强的,而且功能也很强大,也是项目考虑上缓存的首选,这一节主要讲述如何在springboot中集成redis并操作缓存,springboot对于redis的集成也比较方便,spring data也提供了对redis的操作,而且只使用注解的方式就可以很方便的操作redis
目录
1、在pom中添加redis缓存支持依赖
        <!-- redis集成 -->
        <dependency>
            <groupId>org.springframework.boot</groupId>
            <artifactId>spring-boot-starter-data-redis</artifactId>
        </dependency>
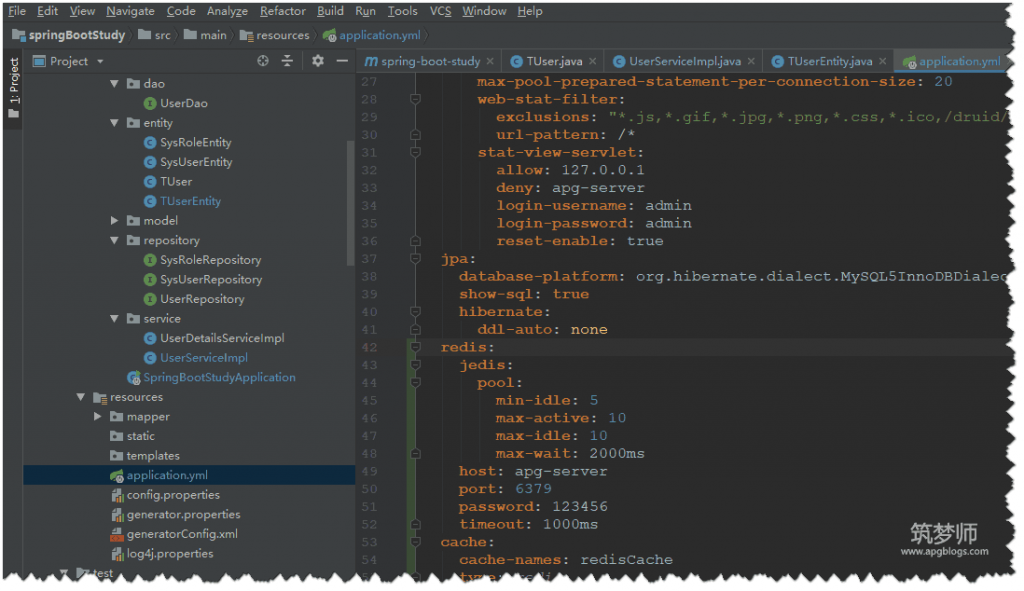
2、修改配置文件添加redis连接设置
只需要看追加的redis和cache部分,其他的跟之前是一样的
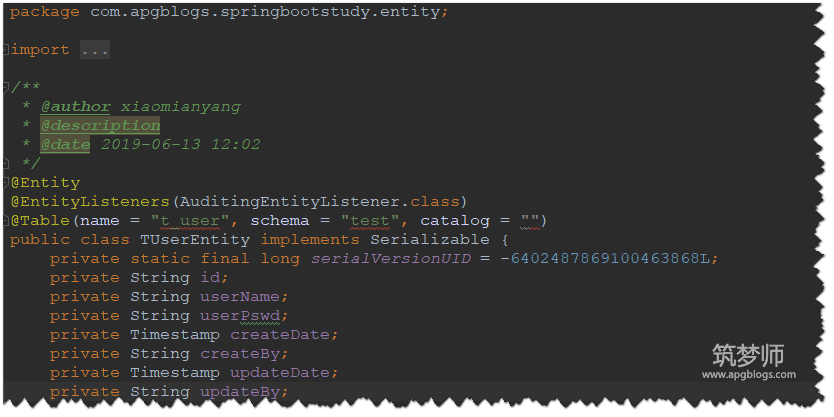
3、修改TUserEntity类,实现序列化接口
实现序列化接口是为了序列化和反序列化当前类
就是将当前实体类以二进制的方式存取,这样就可以存入到redis中了
serialVersionUID 是为了保证类的序列化和反序列化时有一个唯一ID
4、在UserServiceImpl类中添加缓存注解
这里就是重点了,这些注解就很方便的对我们的数据进行了缓存
@Cacheable 根据请求参数缓存
@CachePut 对结果进行缓存,如保存了一条数据可能马上相查这条数据,那么缓存后,下次就可以直接查缓存了而无需查数据库了
@CacheEvict 清空缓存
condition 条件缓存,如果为true就缓存,否则不缓存
更多关于redis缓存的注解可以查看网上的资料会更加详细和全面
package com.apgblogs.springbootstudy.service;

import com.apgblogs.springbootstudy.base.BaseService;
import com.apgblogs.springbootstudy.dao.UserDao;
import com.apgblogs.springbootstudy.entity.TUser;
import com.apgblogs.springbootstudy.entity.TUserEntity;
import com.apgblogs.springbootstudy.repository.UserRepository;
import org.springframework.beans.factory.annotation.Autowired;
import org.springframework.cache.annotation.CacheEvict;
import org.springframework.cache.annotation.CachePut;
import org.springframework.cache.annotation.Cacheable;
import org.springframework.stereotype.Service;
import org.springframework.transaction.annotation.Transactional;

import java.util.List;

/**
 * @author xiaomianyang
 * @description
 * @date 2019-06-13 10:35
 */
@Service
public class UserServiceImpl extends BaseService<UserDao, TUser> {

    @Autowired
    private UserRepository userRepository;

    /**
     * @description 查询所有用户
     * @author xiaomianyang
     * @date 2019-06-13 10:37
     * @param []
     * @return java.util.List<TUserEntity>
     */
    public List<TUserEntity> getUserList(){
        return userRepository.findAll();
    }

    /**
     * @description 查询单个用户
     * @author xiaomianyang
     * @date 2019-06-13 10:39
     * @param [id]
     * @return TUserEntity
     */
    @Cacheable(value="redisCache",condition = "#result!='null'",key="'redis_user_'+#id")
    public TUserEntity getUser(String id){
        if(!userRepository.existsById(id)){
            return null;
        }
        return userRepository.findById(id).get();
    }

    /**
     * @description 创建用户
     * @author xiaomianyang
     * @date 2019-06-13 10:45
     * @param [tUserEntity]
     * @return TUserEntity
     */
    @CachePut(value="redisCache",key="'redis_user_'+#result.id")
    public TUserEntity insertUser(TUserEntity tUserEntity){
        tUserEntity.setCreateBy("sys");
        tUserEntity.setUpdateBy("sys");
        return userRepository.save(tUserEntity);
    }

    /**
     * @description 修改用户
     * @author xiaomianyang
     * @date 2019-06-13 10:40
     * @param [tUserEntity]
     * @return TUserEntity
     */
    @CachePut(value="redisCache",condition = "#result!='null'",key="'redis_user_'+#tUserEntity.id")
    public TUserEntity updateUser(TUserEntity tUserEntity){
        TUserEntity tUserEntity1=userRepository.findById(tUserEntity.getId()).get();
        if(tUserEntity1==null){
            return null;
        }
        tUserEntity1.setUserName(tUserEntity.getUserName());
        tUserEntity1.setUserPswd(tUserEntity.getUserPswd());
        return userRepository.save(tUserEntity1);
    }

    /**
     * @description 删除用户
     * @author xiaomianyang
     * @date 2019-06-13 10:44
     * @param [id]
     * @return void
     */
    @CacheEvict(value = "redisCache",key="'redis_user_'+#id",beforeInvocation = false)
    public boolean deleteUser(String id){
        try{
            userRepository.deleteById(id);
        }catch(Exception e){
            e.printStackTrace();
            return false;
        }
        return true;
    }
}
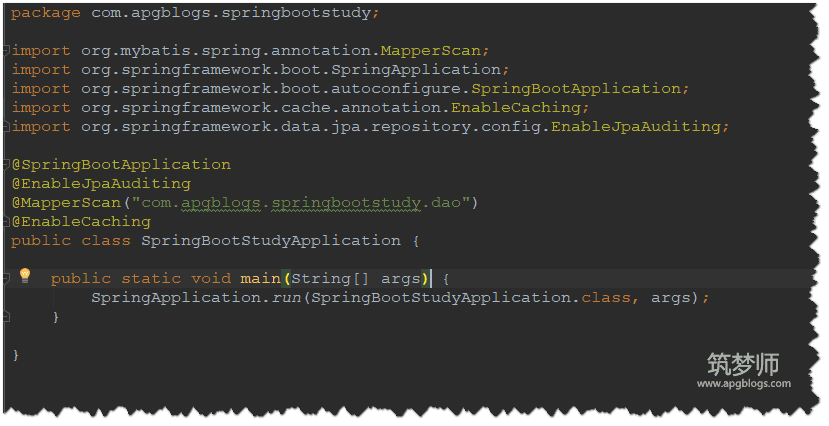
5、在SpringBootStudyApplication项目启动类上添加启用缓存注解
加入@EnableCaching 启用缓存注解
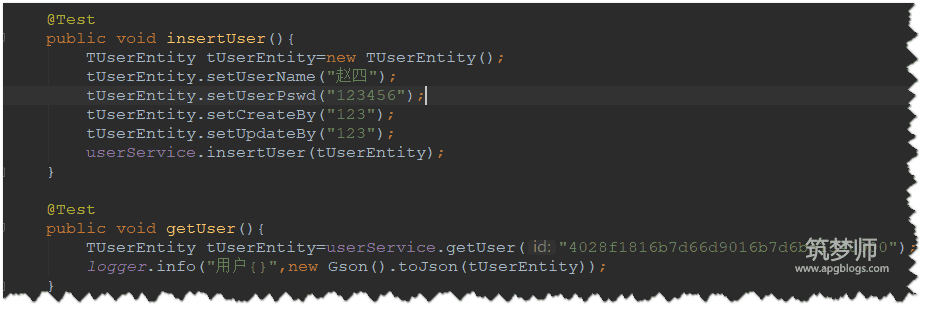
6、在SpringBootStudyApplicationTests中测试加了注解的缓存方法
这里以保存用户和获取用户测试,其他的几个缓存可以自己试验一下
在redis命令控制台查看所有keys
可以看到查询和保存的key就已经缓存到redis中了
[root@apg-server ~]# docker exec -it redis bash
root@98767f0b6826:/data# docker ps
bash: docker: command not found
root@98767f0b6826:/data# redis-cli -h localhost -a 123456
Warning: Using a password with '-a' or '-u' option on the command line interface may not be safe.
localhost:6379> keys *
(empty list or set)
localhost:6379> keys *
1) "redisCache::redis_user_4028f1816b7d66d9016b7d6be1340000"
localhost:6379> keys *
1) "redisCache::redis_user_4028f1816b7d66d9016b7d6be1340000"
2) "redisCache::redis_user_4028f1816bc71702016bc7170f340000"
localhost:6379>
7、文章源码地址
现在redis就已经集成到项目中了,是不是很简单呢,这里只是简单的做了集成,redis还有更多复杂的操作,比如事务处理,注解失效,自定义缓存管理器等,这些在后面根据需求会详细介绍